Showing posts with label recipe. Show all posts

Wednesday, December 21, 2011

rainbow cupcakes!

so last week I decided to make rainbow cupcakes for a few of my coworkers birthdays and I couldn't be more happy with how they turned out.
a lot of the instructions that I found on how to make them just called for a white cake box mix but I was too lazy to go to the store and buy a box - and I wanted to make them from scratch so I found a white cake recipe --
looks like fun, huh?
here's how you make them it's super easy!

Rainbow Cupcakes
Ingredients
1 cup white sugar
1/2 cup butter
2 eggs
2 teaspoons vanilla extract
1 1/2 cups all-purpose flour
1 3/4 teaspoons baking powder
1/2 cup milk
Gel food coloring


Instructions
1. Preheat oven to 350 degrees F (175 degrees C). Grease and flour a 9x9 inch pan or line a muffin pan with paper liners.


2. In a medium bowl, cream together the sugar and butter. Beat in the eggs, one at a time, then stir in the vanilla. Combine flour and baking powder, add to the creamed mixture and mix well. Finally stir in the milk until batter is smooth. 

3. Divide batter into six small bowls (1-2 tablespoons each)

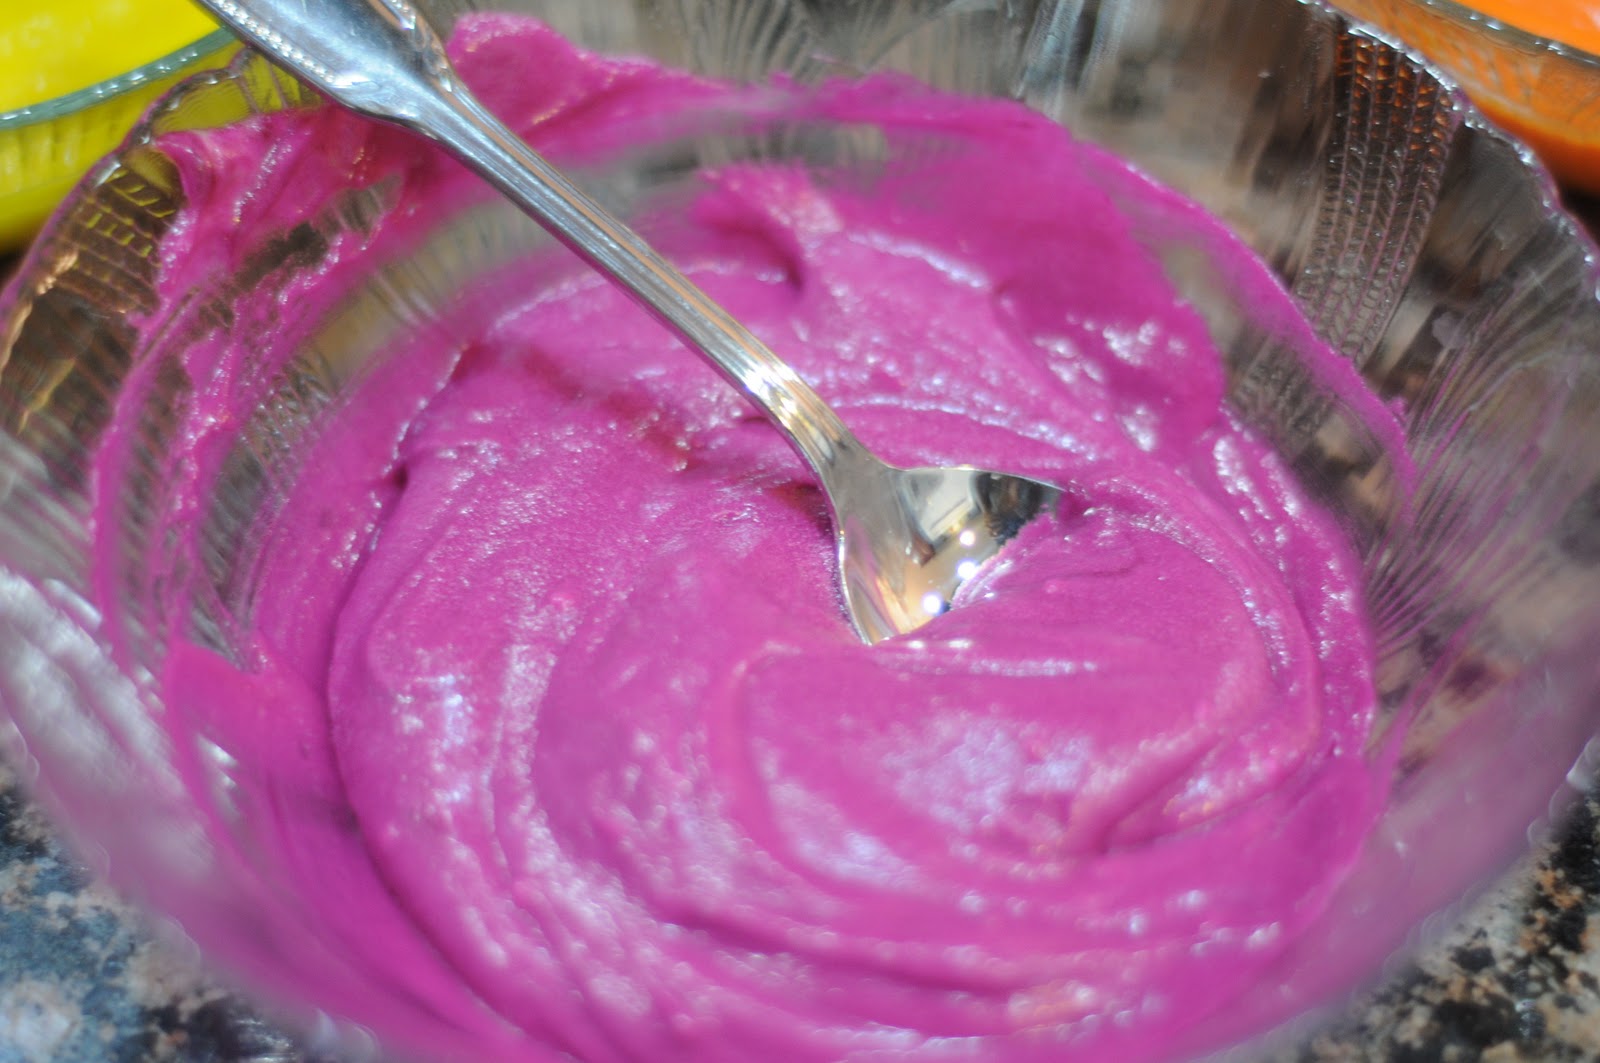
4.  Add gel food coloring to batter (purple, blue, green, yellow, orange, red/pink) - I did pink instead of red just in this batch.

5. Line 16 muffin pan wells with baking cups. Evenly distribute the purple batter among the cups, then the blue, and so on, following the order shown. As you go, gently spread each layer of batter with the back of a spoon to cover the color underneath.


6. Bake 20 to 25 minutes. Cake is done when it springs back to the touch and a toothpick comes out clean.

7. Frost and sprinkle away after cooled!
[white cupcake recipe adapted from allrecipes]

I definitely say go for the gel food coloring if you're going to make them, I've never seen batter or cake come out as vivid as this did and I'm excited to make a rainbow cake next and play around more with the gel food colorings!

In other news, it's gross outside and I'm currently in sweatpants, on the couch, eating fruit, drinking tea and  watching 16 and Pregnant - I don't have plans to do anything else today but be lazy and watch trash tv - sloth day at its best. Vacation is good. :)

Tuesday, December 13, 2011

Holiday Baking!

hi everyone, I'm guest posting over at Married... With a Pup today! I shared a great recipe for Peppermint Meringues and some Holiday Baking Tips, so head over and check them out!
Also, I thought I'd share a few more recipes over here - I was baking up a storm this weekend and made five different types of goodies for co-worker holiday packages for DJ and I... here are two more of the recipes I made --
Peanut Butter Cup Cookies
Ingredients:

  • 1 3/4 cups all-purpose flour
  • 1/2 teaspoon salt
  • 1 teaspoon baking soda
  • 1/2 cup butter, softened
  • 1/2 cup white sugar
  • 1/2 cup peanut butter [creamy, for sure!]
  • 1/2 cup packed brown sugar
  • 1 egg, beaten
  • 1 teaspoon vanilla extract
  • 2 tablespoons milk
  • 40 miniature Reese's Peanut Butter Cups, unwrapped [keep in mind, this is probably two bags -- especially if you have a husband who opens the bag and steals a few... I ran out of them and added m&ms to the leftovers just so they'd have a little something special going on] [also, unwrap early, or you'll be running around like a crazed person while the peanut butter cookies are in the oven trying to get them done in time]
Instructions:
  1. Preheat oven to 375 degrees F (190 degrees C). 
  2. Sift together the flour, salt and baking soda; set aside.
  3. Cream together the butter, sugar, peanut butter and brown sugar until fluffy. 
  4. Beat in the egg, vanilla and milk. 
  5. Add the flour mixture; mix well. 
  6. Shape into 40 balls and place each into an ungreased mini muffin pan.
  7. Bake at 375 degrees for about 8 minutes. 
  8. Remove from oven and immediately press a mini peanut butter cup into each ball. [they won't look done, at least mine didn't - but they are, don't overcook! 8-10 minutes should be plenty]
  9. Cool and carefully remove from pan.
Recipe from allrecipes.com 

Gingerbread Stars
Ingredients:
  • 1/2 cup margarine
  • 1/2 cup sugar
  • 1/2 cup molasses
  • 1 egg yolk
  • 2 cups sifted all-purpose flour
  • 1/2 teaspoon salt
  • 1/2 teaspoon baking powder
  • 1/2 teaspoon baking soda
  • 1/2 teaspoon ground cinnamon
  • 1 teaspoon ground cloves
  • 1 teaspoon ginger
  • 1/2 teaspoon ground nutmeg
Instructions:
  1. In a large bowl, cream together the margarine and sugar until smooth. 
  2. Stir in molasses and egg yolk. 
  3. Combine the flour, salt, baking powder, baking soda, cinnamon, cloves, ginger, and nutmeg in another bowl, 
  4. Blend flour mixture into the molasses mixture until smooth. 
  5. Cover, and chill for at least one hour.
  6. Preheat the oven to 350 degrees F. 
  7. On a lightly floured surface, roll the dough out to 1/4 inch thickness. Cut into desired shapes with cookie cutters. Place cookies 2 inches apart on ungreased cookie sheets.
  8. Bake for 8 to 10 minutes in the preheated oven, until firm. 
  9. Remove from cookie sheets to cool on wire racks. 
  10. Frost or decorate when cool.
Recipe from allrecipes.com

yum. I'm hungry just looking at those pictures...
they're easy & fun holiday cookies, so get to baking! 


Friday, September 9, 2011

cheesy garlic bread recipe

Cheesy Garlic Sticks
[adapted from  Jam Hands]
1 premade pizza dough from Publix
Olive Oil for brushing dough
1 ball of mozzarella (not the kind in water, the kind that is vacuum sealed)
1 tablespoon minced garlic, with flavored oil - or if you love garlic like me 2-3.... seriously.
Italian spices

1. Throw that dough! No seriously, prepare the crust. Transfer to a baking pizza stone or pan. Brush dough lightly all over with olive oil.

2. Cut or pull apart the cheese with your fingers and spread all over the dough. [if you're my husband add all sorts of other veggies, pesto, cheeses and balsamic vinegar] 

3. Drizzle the pizza with a little of the garlic flavored oil from the minced garlic, and sprinkle with minced garlic over the entire pizza. Add just a bit of Italian spices to the top, and bake at 425 for 12-18 minutes. 

4. Warm up some tomato sauce and dip, dip, dip!
yum. 
this will be making another appearance in my kitchen very soon!

Thursday, September 8, 2011

heaven.


package of croissants + tablespoon of nutella in each = heaven.
next time... I'm making some with cheese.

Thursday, September 1, 2011

blueberry crumb bars recipe...


as you know I've been gushing over pumpkin lately, but I'm also trying to cling to the end of summer so I decided to delay my pumpkin baking and make one last blueberry dish for summer... [can I still call it summer even though it's now september? in other news, september?! this summer flew by].  anyways, let me tell you, these did not disappoint. run out, buy some blueberries and make them now!

blueberry crumb bars
[recipe from amybites]
Ingredients
1 cup white sugar
1 teaspoon baking powder
3 cups all-purpose flour
1 cup cold unsalted butter (2 sticks or 8 ounces)
1 egg
1/4 teaspoon salt
Zest and juice of one lemon
4 cups fresh blueberries
1/4 cup white sugar
4 teaspoons cornstarch

Directions:
1. Preheat the oven to 375 degrees F (190 degrees C). Grease a 9×13 inch pan.

2. In a medium bowl, stir together 1 cup sugar, 3 cups flour, and baking powder. Mix in salt and lemon zest. Use a fork or pastry cutter to blend in the butter and egg. Dough will be crumbly. Pat half of dough into the prepared pan.

3. In another bowl, stir together the sugar, cornstarch and lemon juice. Gently mix in the blueberries. Sprinkle the blueberry mixture evenly over the crust. Crumble remaining dough over the berry layer.


4. Bake in preheated oven for 45 minutes, or until top is slightly brown. Cool completely before cutting into squares.


these are super easy and so delicious... they are going to be added into my arsenal of "go-to desserts."
 I brought them into work on Monday for my coworkers and students and they vanished! 
do yourself a favor and make these before the end of summer! 


Tuesday, August 30, 2011

fried rice recipe...

quazi-healthy-fried rice recipe
[adapted from daily garnish]
Ingredients:
1 cup brown rice [1 cup of uncooked]
2 carrots
1/2 white onion
1 shallot [only because I just had it laying around]
1 cup shelled edamame [I used frozen]
4 Tablespoons soy sauce
2 Tablespoons sesame oil
1 Tablespoon butter
1 Tablespoon chopped garlic/1 garlic clove
1 egg

step 1: cook 1 cup of brown rice per instructions on rice box/use rice cooker
step 1: prep cutting veggies [dice onion, shallots carrots] while rice cooks
step 2: add 1 tablespoon of sesame oil to med-high heat skillet/wok - add rice and onions [and if you're like me and have one laying around cut up shallot], cook for around 5 minutes until rice is "fried" and onions are cooked
step 3: add edamame and carrots [and whatever other veggies suit your fancy] and cook
step 4: mix soy sauce and rest of sesame oil together and add to rice/veggie mixture
step 5: push rice/veggies to outside of skillet and fry and egg in the middle, quickly break yolk and scramble egg into rice/veggies [I accidentally did this before I added the soy sauce/sesame oil and it turned out fine]
step 6: add garlic and butter
step 7: add additional soy/garlic to taste

can you believe I did it all on my own without asking DJ a million questions?!
I was super proud of myself and let me tell you...
it is really, REALLY good!

Monday, August 29, 2011

broccoli slaw recipe...

broccoli slaw
[recipe adapted from amy bites]
Ingredients: 
1 head of broccoli
3/4 bag of broccoli slaw
1 cup of craisins
4-5 tablespoons light mayo
4-5 tablespoons fat free Greek yogurt
1-2 tablespoons of honey

this couldn't be easier...
step 1: mix the first three ingredients in a medium bowl
step 2: mix the last three ingredients in another bowl
step 3: mix it all together

ta-da...

let me tell you, yummy.

Tuesday, August 16, 2011

surprise monkey bread recipe

so on sunday I woke up at 7am [no alarm, just internal clock] and was actually excited to get up because I was planning on making "surprise monkey bread" - I found this recipe on pinterest and had been thinking about it all week. so up I went and made this super easy and delicious monkey bread [biscuits, brown sugar and cream cheese? sign me up!]. I figured since we had extra family over I had an excuse to make something a little extra for breakfast [and by breakfast I mean something to munch on all day]...
Surprise Monkey Bread
Ingredients:
1 cup packed brown sugar
1/2 cup butter, cubed
2 tubes (12 ounces each) refrigerated flaky buttermilk biscuits
1/2 cup sugar
1 tablespoon ground cinnamon
1 package (8 ounces) Cream Cheese (softened or cubed), cut into 20 cubes

Directions
In a small microwave-safe bowl, heat brown sugar and butter on high for 1 minute or until sugar is dissolved; set aside.

Flatten each biscuit into a 3-in. circle. Combine sugar and cinnamon; sprinkle 1/2 teaspoon in the center of each biscuit. Top with a cream cheese cube. Fold dough over filling; pinch edges to seal tightly.

Sprinkle 1/2 cup walnuts into a 10-in. fluted tube pan coated with cooking spray. Layer with half of the biscuits, cinnamon-sugar and butter mixture. Repeat layers.

Bake at 350° for 45 minutes or until golden brown. Immediately invert onto a serving platter. Serve warm. Refrigerate leftovers. Yield: 1 loaf 
yup. it's as good as it looks.
I had to throw away the half we had left in fear that I would have eaten in all within 48 hours.
I'm kinda pissed I did that now.

Wednesday, August 10, 2011

asian meatloaf recipe...

DJ and I are lovers of all Asian cuisines + lovers of meatloaf so what better way making a great dinner than by combining both of those things and creating an Asian Meatloaf - we wanted to get some ideas of what to do/make so we turned to our good friend Google [GIB] and stumbled upon a good recipe to base ours off of from Oishii, we were already planning on heading to the Gwinnett International Farmers Market so we were able to get everything we needed from there...

pre-chopping... [we ended up not using the shallots]
 chop-chop...
 we love some garlic...
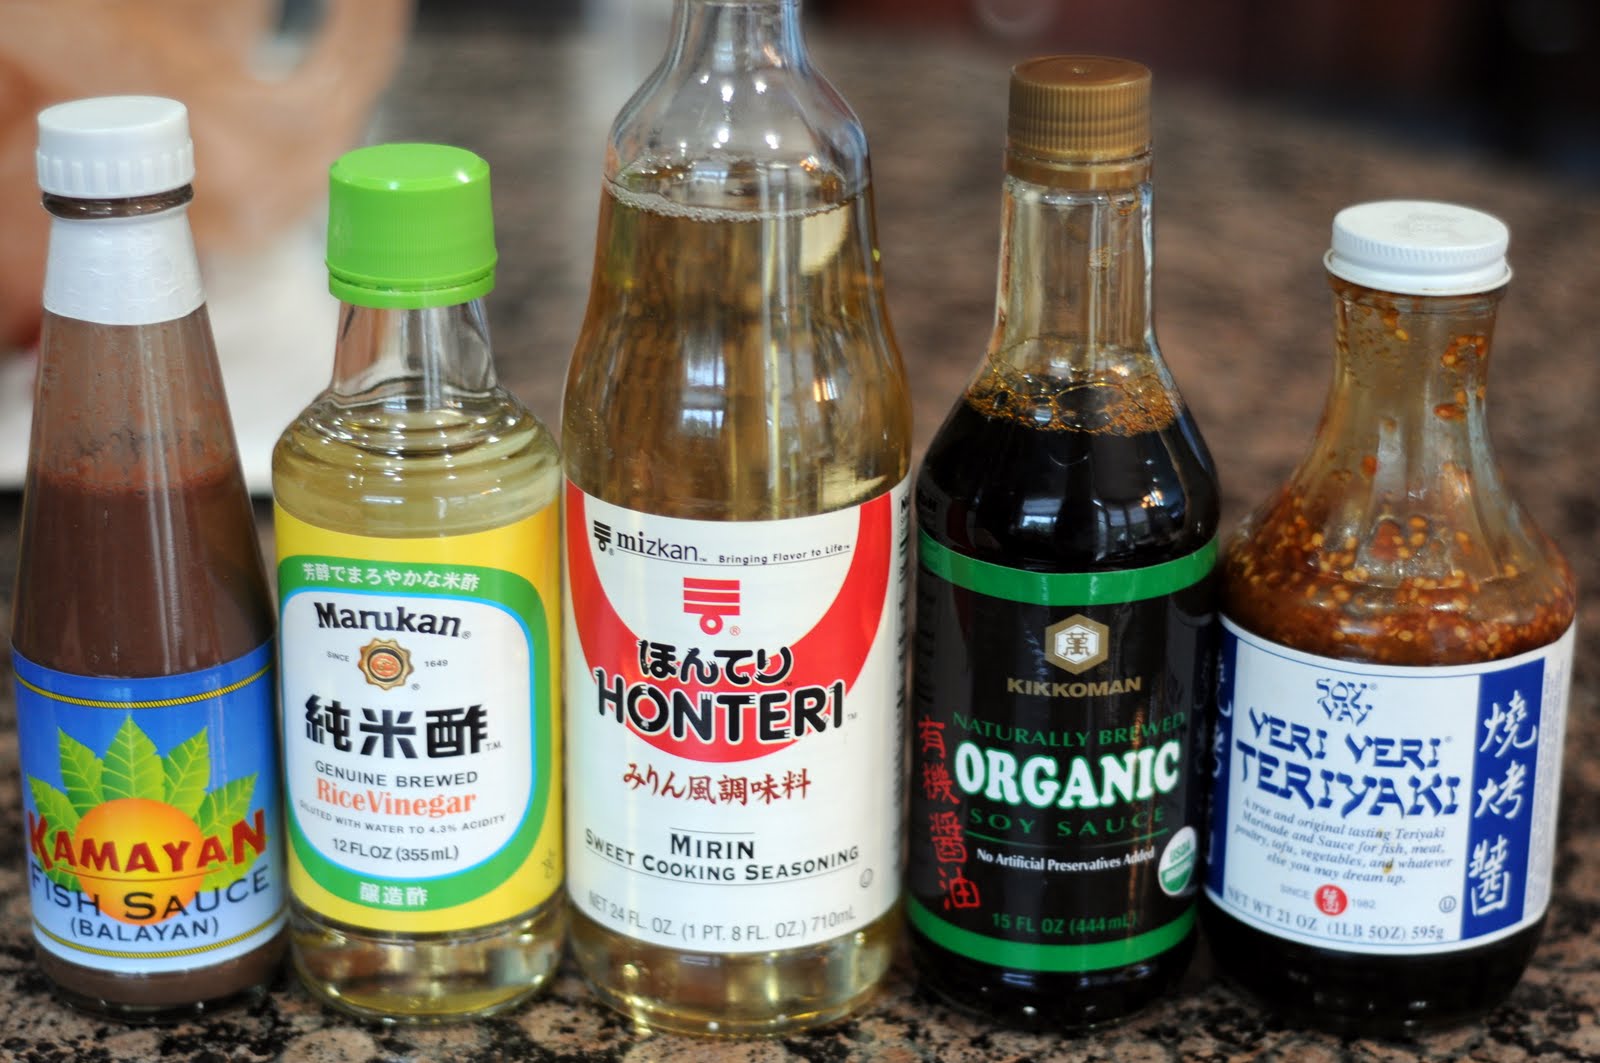
 sauces galore....
 panko breadcrumbs...
 one big loaf...
 glaze...
 ollie waiting for a dropped piece of meatloaf...
 glazed...
We doubled the original recipe because we wanted leftovers [yup, we really like meatloaf]

Asian Meatloaf
For the Meatloaf:
3.5 TBS. red miso, dissolved in a little water to form a paste, divided
1 lb. ground pork
1 lb. ground beef
2/3 cup panko breadcrumbs [we didn't measure, just poured them in to the consistency we wanted]
2 eggs
5 green onions, white & green parts chopped
1/2 white onion, chopped
a thumbnail-sized piece of ginger, peeled and minced
4 cloves garlic, minced [we clearly put a lot more in!]
4 TBS. soy sauce
3 tsp. fish sauce
3 tsp. rice vinegar
3 tsp. mirin
a squeeze of honey
1 tsp. brown sugar
1 healthy pouring of Soy Vay - we used Soy Vay instead of the honey/brown sugar but ours was a little salty so next time we're going to add them...

For the Glaze:
We just mixed these to taste:
Sriracha
Ketchup
Mai Poi
Chili Paste
Hoisin Sauce
The recipe called for:
1 TBS. chili paste (such as Sambal Oelek)
squeeze of honey
squeeze of hot chili sauce (such as Sriracha)
1/2 tsp. brown sugar

Preheat oven to 350 degrees. 

In a large bowl, combine all ingredients other than breadcrumbs. Mix with your hands until combined. Add breadcrumbs until you achieve the consistency you want.

Shape the meat-mixture into a loaf-shape on a greased baking sheet.

Bake the meatloaf for about 30 minutes, remove meatloaf and add glaze, bake for an additional 30 minutes or so until your loaf is cooked! Presto...

perfection...

Monday, August 8, 2011

chocolate chip + m&m cookie recipe

this weekend was just what the doctor ordered, lots of relaxing and QT with DJ.... friday night we went to grab mexican food for dinner and then just relaxed at home and drank our "august wine" from our year-long wine wedding gift. the dinner was eh, the wine when we got home was much better.  
saturday we had to go move our storage unit to another unit within the building [don't ask, random but annoying] and then we just laid around the house for a bit before having "domestic saturday" -- we ran some errands, cleaned, did laundry, made dinner.  I had a bag of chocolate chips laying around and hadn't baked in forever so I decided to make some cookies - DJ then requested M&Ms [because he's a diva] and I obliged so I ran out and grab some and found a recipe via picky palate which was GREAT! the cookies turned out great and I definitely recommend this recipe, we'll be making it again that's for sure!


the picky palate recipe calls for a muffin top pan, which we don't currently have [but I definitely want] so we just used two cookie sheets and it worked out fine!


the best part, the batter...


batter thief...


I'm a good wife and made DJ a few "gator cookies"


and of course had to represent my alma maters too... 


DJ's cookies [we cooked his for around five minutes less than mine [9-10 minutes] so that they'd still be gooey the way he likes them..


we cooked mine for around 15 minutes or so and they were perfect!

XXL M&M Chocolate Chip Cookies
2 sticks softened butter
3/4 Cup sugar
1 Cup packed light brown sugar
2 extra large eggs
2 Tablespoons pure vanilla
3 3/4 Cups all purpose flour
1 1/2 teaspoons baking soda
3/4 teaspoon salt
12 oz bag chocolate chips
1 bag M&M’s + 1 tube of mini M&Ms

1.  Preheat oven to 350 degrees F.  In a stand or electric mixer beat the butter and sugars until well beaten.  Beat in eggs and vanilla until well combined.  Place flour, baking soda and salt into a large bowl; mix.  Slowly add to wet ingredients along with the chocolate chips.  Do not mix in M&M’s!! I mixed in around half of the bag of m&ms just because I'm a rebel...
2.  Scoop 1/4 Cup of dough and press into a muffin top pan (or just press onto a parchment or silpat lined cookie sheet).  Now, press your M&M’s onto pressed cookies.  This way they won’t break apart!!  Bake for 12-15 minutes, until edges just start to turn golden brown.  Let cool for 10 minutes on muffin top pan or cookie sheet before transferring to a cooling rack.  Grab a tall glass of milk and EAT until your hearts content


These cookies are amazing the next day too after you pop them in the microwave for 15 seconds... I might have had two for breakfast yesterday!

Wednesday, July 6, 2011

summer recipes...

so this weekend was quite a success... lots of lounging around on the couch, swimming, laying out at the pool, sparklers, reading and outlet shopping. very american, eh? oh yes, and we made [and drank] lots of sangria... I made three different types of sangria - two were a big success, one was  bust... hey you can't win 'em all. anyways, I had a great weekend with lindi-lou and DJ and two of the sangria recipes were just too good not to share so here you go...


  • 2 bottles chilled dry red wine, like Rioja
  • 1 cup brandy
  • 1 cup orange juice
  • 1/4 cup superfine granulated sugar
  • 2 oranges, cut into thin rounds
  • 2 Meyer lemons, cut into thin rounds
  • 3 Key limes, cut into thin rounds
  • 2 apples, cored and cut into 1/2-inch chunks
  • 2 cans of Fresca* 
  • [*Food Channel recommends 2 cups of Club Soda but the Fresca makes it extra yummy in my opinion]

In a pitcher, combine the wine, brandy, orange juice, and sugar and stir until the sugar dissolves. Add the orange, lemon, and lime slices, the apples and refrigerate until well chilled, about 1 hour [we let ours sit overnight]. Remove from the refrigerator and add the soda.  Serve and enjoy! This was a great hit at the party we took it to, everyone was asking what was in it disappeared quickly! I would definitely make it again!

Makes 8 cups [next time I'm doubling the recipe... it was that good]
Ingredients:
1  (750-milliliter) bottle white wine [RIESLING
1  cup  peach schnapps
1/2  cup  frozen lemonade concentrate, thawed
2  nectarines, sliced
1  cup  green or red grapes, whole or sliced


Combine all ingredients in a large pitcher.
Cover and chill at least 2 hours or overnight. 
Stir before serving.

yup, it's that easy and that good - I will warn you, this recipe is VERY sweet... if you don't like sweet drinks, it's not for you - aka Lindi-Lou and I loved it and DJ gagged when he drank it. 

I also made a batch of Sparkling Sangria.... it was not good. BUT, I let the fruit sit in the booze [minus champagne] for a day and a half before drinking it [not what the instructions say to do, oops]... it was too boozy/not sweet enough for my taste [now that I think about it - did I even add the sugar?? damnit- who knows], ANYWAYS - it might be one to try again on another day. 

we also had a [patriotic] berry tart for dessert over the weekend...
 Ingredients
  • 8-ounce sheet frozen puff pastry, thawed
  • large egg, beaten
  • 1 tablespoon granulated sugar
  • 4 ounces cream cheese, softened
  • 1/4 cup heavy cream
  • 1/2 teaspoon grated lemon zest [or lemon juice if you realize you forgot to zest the lemon at the last minute and you're too lazy to do it]
  • 3 tablespoons confectioners' sugar
  • 2 cups blueberries [or 1 cup of blueberries and 1 cup of raspberries... I might even double the fruit and do two cups of each and I would add strawberries next time too]

Directions

  1. Heat oven to 375° F. On a lightly floured surface, unfold the sheet of pastry and roll it into a 10-by-12-inch rectangle. Transfer to a parchment-lined baking sheet.
  2. Using the tip of a knife, score a 1-inch border around the pastry without cutting all the way through. Brush the border with the egg and sprinkle with the granulated sugar. Bake until golden and puffed, 18 to 22 minutes.
  3. Using the tip of a knife, rescore the border of the cooked pastry without cutting all the way through. Gently press down on the center of the pastry sheet to flatten it. Let cool to room temperature, 15 to 20 minutes.
  4. Meanwhile, with an electric mixer, beat the cream cheese until smooth. Add the cream, lemon zest, and 2 tablespoons of the confectioners’ sugar and beat until smooth. Spread the cream cheese mixture evenly within the borders of the pastry.
  5. Arrange the blueberries in a single layer over the filling and sprinkle with the remaining tablespoon of confectioners’ sugar.
As easy as can be - but it tasted like it was missing something to me, next time I'll definitely add the zest and more fruit to make it more "lively" - but it wasn't bad at alll - you can't go wrong with puff pastry!

Friday, July 1, 2011

summer sangria

I don't know about you about you but I am psyched for the upcoming three day weekend. We don't have any major plans just enjoying having Lindi in town, going on a hike, grilling out and laying by the pool with the fam. I'm also planning on whipping up a batch (or two or three) of sangria tonight so that it'll be nice and ready for us all weekend long.


Now the tough part - which sangria recipe to make?! I think I've narrowed it down to these...


Sparkling Sangria...


Peach Sangria...

Red Sangria...

Traditional Sangria...


thoughts? 
I'll be sure to share how the finished result is!

Follow this blog with bloglovin

Follow on Bloglovin

LinkWithin

Related Posts with Thumbnails